We hope that you will take the time to leave comments on our posts, as we really love feedback from our blog viewers....whether it was something that you really liked or some new technique that was used that you would like to learn how to do....by leaving us comments, we get to hear what you like, and what you want to see. Thank you… now on to our hop!
If you have just hopped onto my blog, you can start here as this is a circular hop, but if you want to follow our team's blogs, then please start at the beginning and join Brae Montgomery at
If you came from Michelle Hughes - http://therighthugh.blogspot.com/2014/03/sunshine-blog-hop.html then you are in the right place!
POP UP BOX CARDS ARE SOOOOOOO COOL!!!
Have you seen the cool pop-up box cards yet? I found the tutorial on Splitcoast Stampers (http://www.splitcoaststampers.com/resources/tutorials/popupboxcard/) and knew I wanted to try to create one of these after seeing how easy they were to make. (And they look so difficult...but they aren't!!! I promise!!)
I used the new paper Balloon Ride Paper Packet (I'm not usually a fan of pink...but I think I'm really starting to love this paper!!) This paper reminded me of spring and all the beautiful flowers that will be popping up (get it, popping up ~ pop up box card???) after the warm spring sunshine starts to melt all this snow we have this year!!


Step-by-Step
Step 1
- Cut cardstock to 8.5” x 12”. Score on the long side at 2.75”, 5.5”, 8.25”, and 11”.
Hint:
For scoring boards not marked at quarter inches, score at 5.5” and 11” first. Move the cardstock .25” to the right, then score the other lines at 3” and 8.5”.
Step 2
Cut off a 2”x12” strip , and set it aside. This will be used later.
Step 3
Turn the 6.5” x 12” panel a quarter turn to the left, and score at 2.75.”
Hint:
For scoring boards not marked at quarter inches, move the cardstock .25” to the right, then score at 3”.
Hint:
For scoring boards not marked at quarter inches, move the cardstock .25” to the right, then score at 3”.
Step 4
Cut down 2.75” to this score line along each of the 4 perpendicular score lines.
At the 11” score line, cut in at a slight angle up from the edge of the cardstock to remove the excess above the score line and create a tab.
Step 5
Cut the 2”x12” strip at 4.75” from the end with the 1" score line. Cut the strip in half the long way to create two strips, 1”x4.75”.
Both strips should be scored in 1” from each end. Fold both tabs back.
Step 6
Cut patterned paper to decorate each panel, as follows:
1 inside back panel - 2.5”x6.25”
3 lower panels (outside only) – 2.5”x3.5”
6 upper panels (sides and front, inside and outside) – 2.5” square
Cut one 2.5”x6.25” outside back panel from white cardstock.
1 inside back panel - 2.5”x6.25”
3 lower panels (outside only) – 2.5”x3.5”
6 upper panels (sides and front, inside and outside) – 2.5” square
Cut one 2.5”x6.25” outside back panel from white cardstock.
The splitcoast stamper webpage has the best photos to show you how to make the box, but here are 2 of her photos to help you. Check out her tutorial for all the other photos!


Center and adhere each panel as indicated above.
Hint:
Attach the longest decorative panels to the section next to the tab.
Step 7
Fold the decorated card on the 5.5” score line, and attach the tab inside with adhesive.
Step 8
Apply adhesive to the end tabs of the 1”x4.75” strips, and adhere them to the inside of the opened box, aligning them with the top of the opening. Turning both tabs toward the outside front or back of the box will help ensure straight placement.
Hint:
Close the box in both directions and secure the score lines to ensure that it will lie flat for mailing.
Hint:
Close the box in both directions and secure the score lines to ensure that it will lie flat for mailing.
Step 9
Adhere die cuts, stamped images, and/or other embellishments to the strips and inside front and back of the card. Stick them down lightly at first, as they may need to be repositioned. Inside elements should be placed so that they are not seen when the card is closed.
Hint:
A 3" square sticky note is the approximate size of the visible area to be decorated, and can be used as a template to plan the arrangement of the diecuts and other inside elements.
Hint:
A 3" square sticky note is the approximate size of the visible area to be decorated, and can be used as a template to plan the arrangement of the diecuts and other inside elements.
Smaller die cuts can be attached to 3.5" strips of clear acetate. These will wave slightly when the card is opened.
I put some of the flowers and the butterflies that I cut out from my Cricut cartridge onto the clear acetate so it looked like they were blowing in the cool summer breeze!!
I also fussy cut one of the hot air balloons from the B&T Duos™ Papers to add to the card!

Step 10
Embellish the inside front flap if desired.
Step 11
Complete the project.
Note:
Finished card fits in a 6"x9" envelope.
Measurements for standard A2-sized cards are listed below the video on the original post from splitcoast stampers.
Note:
Finished card fits in a 6"x9" envelope.
Measurements for standard A2-sized cards are listed below the video on the original post from splitcoast stampers.
The paper I used is from the Balloon Ride Paper Packet $9.95 X7180B

PRODUCT DESCRIPTION
6 – 12" × 12" B&T Duos™ Papers (2 each of 3 double-sided designs)
6 – 12" × 12" Cardstock Sheets (2 Cashmere, 2 Saddle, 1 Colonial White, 1 Crystal Blue)
6 – 12" × 12" Cardstock Sheets (2 Cashmere, 2 Saddle, 1 Colonial White, 1 Crystal Blue)
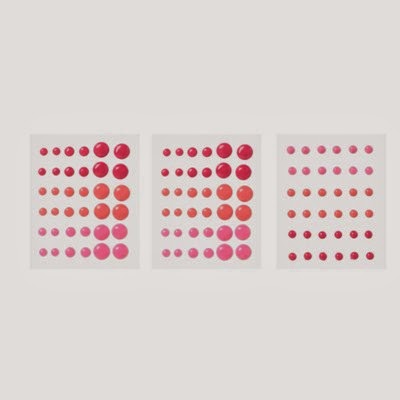
The little embellishment on the front are from these 2 cute collections:

Balloon Ride Assortment $5.95 Z3003 8 adhesive-backed resin pieces, ½" – 2".
(For some reason these remind me of those Misty Mints my grandmother always had!)
(For some reason these remind me of those Misty Mints my grandmother always had!)

Or you can get all the items in the Workshops on the Go™ Balloon Ride Scrapbooking Kit
(and you get a very nice stamp set with it!!)

Contents
Balloon Ride Paper Packet
My Acrylix™ Balloon Ride Workshop Stamp Set (D-size)
Cardstock Sheets (1 Colonial White, 1 Juniper, 1 Whisper)
Balloon Ride Assortment
Sparkles Clear Flourishes—Small
Instructional Brochure
Featured Colors: Cashmere, Colonial White, Crème Brulee, Crystal Blue, Juniper, Saddle, Sky, Sorbet
My Acrylix™ Balloon Ride Workshop Stamp Set (D-size)
Cardstock Sheets (1 Colonial White, 1 Juniper, 1 Whisper)
Balloon Ride Assortment
Sparkles Clear Flourishes—Small
Instructional Brochure
Featured Colors: Cashmere, Colonial White, Crème Brulee, Crystal Blue, Juniper, Saddle, Sky, Sorbet
Follow the included step-by-step instructions to create the two-page layout featured in the workshop guide. The layout pattern is a Jeanette Lynton original created exclusively for this workshop. Then use your remaining materials and online tips to create an additional layout, shown in the guide.
Some basic tools you may already have, such as inks, stamp blocks, or how-to books, are needed to complete these projects.

Hope you have fun creating your own sunshine and warm breezes card!
Your next stop on the Team Braer Hop is Sheri Ballantyne -- http://sherisays-justscrapit.blogspot.com/2014/03/the-brae-ers-sunshine-and-warm-breezes.html to help inspire you with her amazing creation!
If you get lost along the way, you can head to Brae's blog at www.brae-er.com, as she has the complete blog list.http://wp.me/p4htXJ-rP
Thanks for hopping along with us - we hope we were able to inspire you to get creative using some of the designs, products and techniques seen along the way. Join us next month where we will be featuring things that features 'Our Favourite Things'!
Our Blog Hop:
1. Brae Montgomery- Here is my link: http://wp.me/p4htXJ-rP
2. Carol Taggio- http://craftycarol55.blogspot.com
4. Alyson Mayo - http://createwithalyson.blogspot.com/2014/03/unit-blog-hop-spring-card-box.html (permalink)
5. Michelle Stewart -http://mycreationswithmichelle.blogspot.com/2014/03/sunshine-and-warm-breezes-blog-hop.html
6. Arlene Bonsma - http://arlenescreativespace.blogspot.com/2014/03/sunshine-and-warm-breezes-march-blog-hop.html
7. Chris Robertson- http://chriscreativelife.blogspot.com/2014/03/sunshine-and-warm-breezes-march-blog-hop.html
8. Kimberly Clark - http://leokc34.blogspot.com/2014/03/hop-sunshine-and-warm-breezes.html
9. Michelle Hughes - http://therighthugh.blogspot.com/2014/03/sunshine-blog-hop.html
10. Tamara Lisowski - http://geermara.blogspot.com/2014/03/ctmh-sunshine-and-warm-breezes-march.html
11. Sheri Ballantyne -- http://sherisays-justscrapit.blogspot.com/2014/03/the-brae-ers-sunshine-and-warm-breezes.html
12. Heather Steeves - http://paperplayroom.blogspot.ca/2014/03/sunshine-and-warm-breezes-march-team.html