Thursday, September 11, 2014

September CTMH Blog Hop: Back to 'school' we go!

September brings all the kids back to school...so the CTHM consultants from  The Brae-er's - Close to my Heart Unit Family have decided to go back to school too!!  This hop will have a bit of a different twist on it- we will create a piece of artwork using current product BUT it must have a tutorial aspect.  This could be done in a video, by picture tutorial or in another format.  We may do something simple (like how to use our embossing folders) or some of us may go BIG!

So for this Blog Hop, You will see creations from our team that may include stamp sets,patterned paper,inks, embellishments and more from the New Close To My Heart Idea book ~ 2014–2015 Annual Inspirations. To purchase any of the items seen in our blog hop today, kindly contact me to place an order or you can order on line at: http://cardsbytamara.ctmh.com.

We hope that you will take the time to leave comments on our posts, as we really love feedback from our blog viewers....whether it was something that you really liked or some new technique that was used that you would like to learn how to do....by leaving us comments, we get to hear what you like, and what you want to see. Thank you… now on to our hop! 

If you have just hopped onto my blog, you can start here as this is a circular hop, but if you want to follow our team's blogs, then please start at the beginning and join Brae Montgomery at http://wp.me/p4htXJ-A7

If you came from Chris Robertson- reinker bubbles http://chriscreativelife.blogspot.com/2014/09/brae-er-team-blog-hop.html then you are in the right place!  Hope you loved her ideas!


For this blog hop I've decided to show you how to do the Magical Masking Tape Technique or as some call it the painters tape background technique...to use masking tape to transfer ink for a unique background
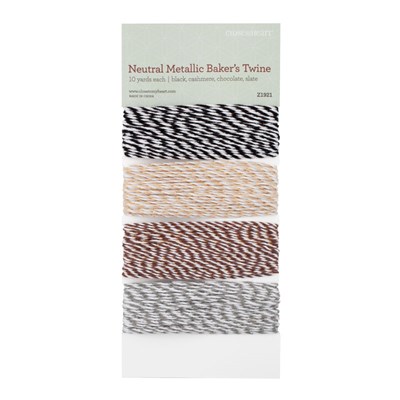
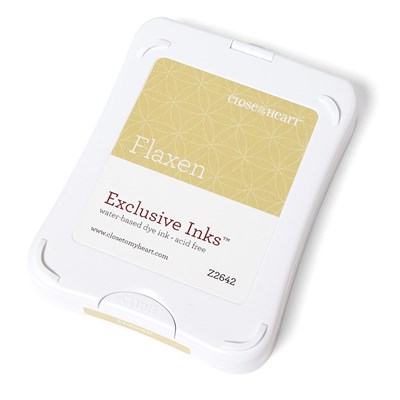
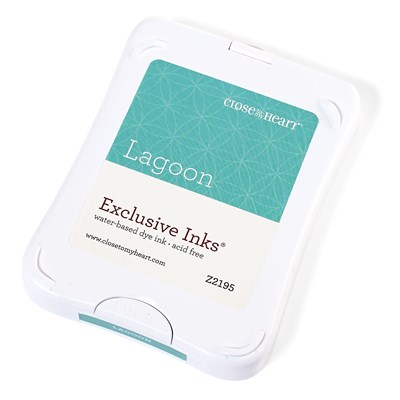
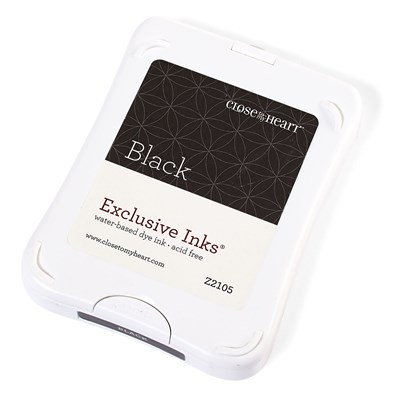
Supplies Needed


  • Masking Tape, or green or blue painters tape (I used green painters tape in 2 widths) 


  • White and Lagoon Cardstock, Seaside Paper Pack 


  • Water-Based Ink (Glacier, Lagoon, Flaxen) 


  • Stamps


  • Step-by-Step

    STEP 1:  Tear off a strip of tape a little longer then your ink pad.  I used the wider tape first for the sand in the new Flaxen color.  Lay the piece of tape directly on to the stamp pad, sticky side onto the ink

    STEP 2:  Ink the tape up well by rubbing your finger over the tape. Gently pick it up and place the piece of tape directly onto the card. Rub the tape well -- it will stick, but it's easy to remove, and the beauty of using painters' tape versus masking tape is that it won't pull up your paper fibers when you remove it. Pull up just a section first


    If the coverage of ink isn't what you hoped for, gently lay it back down and rub the tape again to move the ink around a bit. 

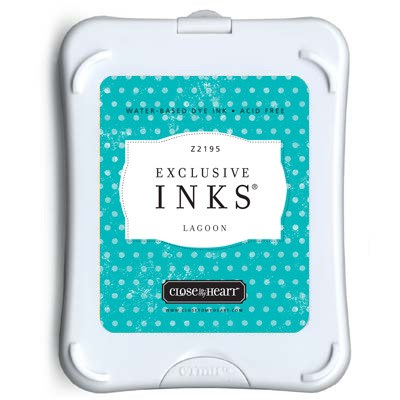
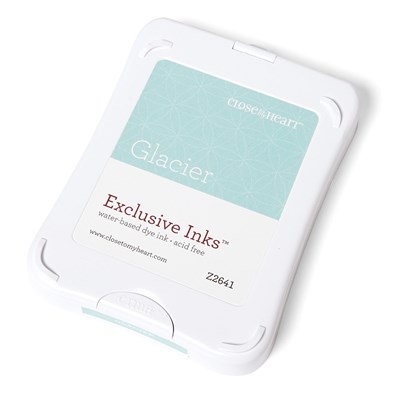
    STEP 3:  Remove the tape, and ink up your next color, repeating as many times as you'd like to get the desired effect you want.  I used the narrower tape for the Lagoon and Glacier Ink.
    To Make the sky a bit wider (or if you don't have the wide tape, reink the tape and repeat higher up!)


    Tada!


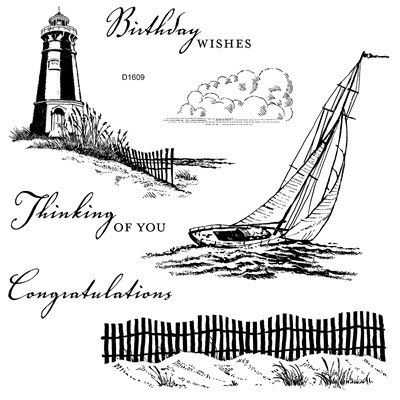
    STEP 4:  Allow all of the ink to dry thoroughly before stamping a sentiment or other art on top of your painters' tape stripes. Embellish the card as you wish. Here I used the Lighthouse from the beautiful Seaside Greetings Stamp set and it lines up perfectly with the sand and the water!!!  I then used the Lagoon ink to embellish the inside of the card.

    The paper size was 6x12 inches


    Tah-dah!  You've now learned how to stamp using Painters' Tape. Fun, ehhh?  And a cool part: no stamp clean-up ... just throw away your used piece of tape when you're done.  

    A little hint: If you're making more than one of these cards, you can use individual pieces of tape for each color ink pad. Simply write the color on the back (non-sticky) side of the tape and use it as much as you need to, without fear of cross-contaminating ink colors.


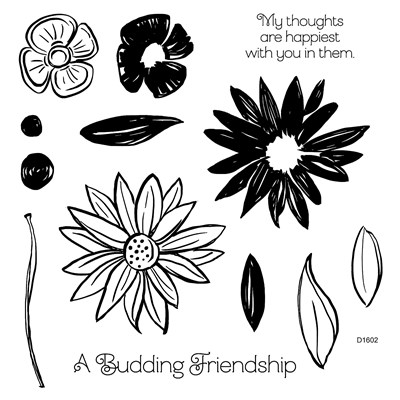
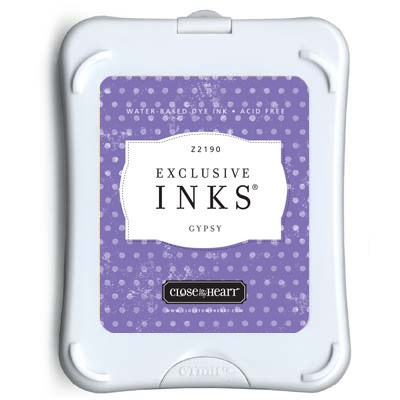
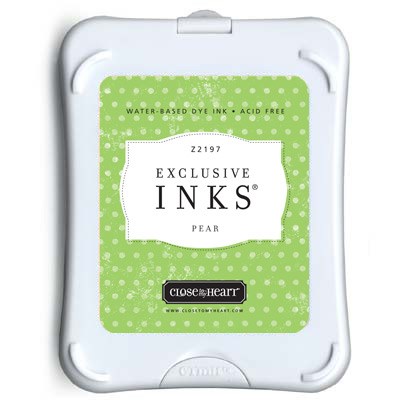
    CTMH Products Used ~


    Seaside Greetings $19.75 D1609
    Seaside Paper Packet $10.95 X7192B

    September is National Stamping Month, and Close To My Heart is ready to celebrate all month long! When you spend $30 on any current retail-priced stamps during the month of September, you qualify to receive the exclusive C-sized stamp set #30yearsofhappy for FREE! This special offer is part of our celebration of National Stamping Month and in honor of our ongoing celebration of our founder and CEO Jeanette Lynton’s 30-year anniversary in the scrapbooking and stamping industry. The exclusive stamp set features 30 mini images and sentiments perfectly suited for 30 days of happy stamping! Plus, make sure you check out Close To My Heart’s Facebook page and Instagram during September to follow all the ways we’re celebrating #30yearsofhappy for a full 30 days! Dates: Offer valid September 1, 2014–September 30, 2014.


    Your next stop on the Team Braer Hop is Julie Sinnott  http://12x12travels.blogspot.com/2014/09/team-brae-er-september-blog-hop-back-to.html to help inspire you with her amazing tutorial! 

    If you get lost along the way, you can head to Brae's blog at www.brae-er.com, as she has the complete blog list .http://wp.me/p4htXJ-A7


    Thanks for hopping along with us - we hope we were able to inspire you to get creative using some of the designs, products and techniques seen along the way.  Join us next time where we will be featuring things where it will be showing things that make us Happy With CTMH 

     Can't wait to see what everyone comes up with next time!!


    1. Brae Montgomery- inked embossing folders http://wp.me/p4htXJ-A7
    2. Michelle Stewart -resist embossing - http://mycreationswithmichelle.blogspot.com/2014/09/brae-ers-team-blog-hop-resist-embossing.html
    3. Chris Robertson- reinker bubbles (if it doesn't work I will do something else) http://chriscreativelife.blogspot.com/2014/09/brae-er-team-blog-hop.html
    4. Tamara Lisowski - Painter’s Tape Background Technique http://geermara.blogspot.com/2014/09/september-ctmh-blog-hop-back-to-school.html
    5. Julie Sinnott - http://12x12travels.blogspot.com/2014/09/team-brae-er-september-blog-hop-back-to.html  basic blending with the markers
    6. Carol-Anne Grenier - http://cagrenier.blogspot.ca/2014/09/brae-er-team-blog-hop-back-to-school-we.html
    8. Darcel Kirvan - Hip Pic/Artbooking albumhttp://closetomyheartkw.blogspot.ca/2014/09/september-blog-hop-hip-pic-album-grad.html
    9. Heather Dawson ttp://pagesbyheatherd.blogspot.com/2014/09/back-to-school-blog-hop.html
    10. Michelle Hughes - shaker card http://therighthugh.blogspot.com/2014/09/team-back-to-school-blog-hop.html


    Saturday, August 9, 2014

    CTMH August Blog Hop In With The New!!

    As of August 1 you can start to order from the new Catalog!!
    Be sure to check it out... it has over 250 new products!
    A year-long book replaces the twice-annual smaller publications. This one is packed with 193 pages, including 250+ brand new products. There are five new colors introduced this year, each with its own bulk paper pack and complementing Exclusive Ink Pad.  

    So for this Blog Hop, You will see creations from our team that may include stamp sets,patterned paper,inks, embellishments and more from the New Close To My Heart Idea book ~ 2014–2015 Annual Inspirations. To purchase any of the items seen in our blog hop today, kindly contact me to place an order or you can order on line at: http://cardsbytamara.ctmh.com.

    We hope that you will take the time to leave comments on our posts, as we really love feedback from our blog viewers....whether it was something that you really liked or some new technique that was used that you would like to learn how to do....by leaving us comments, we get to hear what you like, and what you want to see. Thank you… now on to our hop! 

    If you have just hopped onto my blog, you can start here as this is a circular hop, but if you want to follow our team's blogs, then please start at the beginning and join Brae Montgomery at http://wp.me/p4htXJ-yY

    If you came from Michelle Stewart http://mycreationswithmichelle.blogspot.com/2014/08/brae-ers-team-blog-hop-featuring-new.html then you are in the right place!

    Here is my attempt with recreating a card I saw on Pinterest that was done on watercolor paper!  I tried the card two different ways to see what look I liked best.  But I think I like each of them!  
    Two different views 


    I found that the more you spray the paper with water, the more runny, and muted the color becomes. So spray a small amount of water first and then add more to get the look you are going for!  Also, wait until the paper is fully dry (or heat dry it) before stamping the sentiment!
    I found the Watercolor paper at Michael's in the kids paper section at 1/3 the price of the paper in the artist section.  I tried to compare the quality, and they seemed similar and worked well for this project!


    My inspiration for this card came from Pinterest on this website, and also from another website with this amazing color palette (seen below) and this card (such amazing talent there!!) that is shown below.  I just knew that I really wanted to try to recreate this card using some of the new CTMH stamp sets!!! 
     

    The instructions for this card from the website were: For it to work you must use watercolor paper as it's heavy and porous enough for many sprits of water, blotting dry, more water, ink...  I start by misting my watercolor paper with a Mini Mister filled with plain water.  Then I stamp a layer of images and let then wick and bleed in the water.  I blot a little with a paper towel then spritz more water and stamp again.  I keep going until it looks done.  With each repetition of water and stamping I spritz less and less and the result is a sharper, less defused, image.  My last image stamped was the greeting.  At that time the paper was totally dry.

    I decided to use a new stamp set A Budding Friendship $19.75 D1602 because I thought the flowers looked very similar and would give the look I was going for!
    I used the following ink pads: 


    And finished it off with a piece of from the Baker's Twine Neutral Metallic Assortment $6.50 Z1921
    And put it on 12" X 12" Lagoon Cardstock $15.95 X5762


    Hope you love making this card as much as I did!


    Your next stop on the Team Braer Hop is Nicky Scott - http://www.timelesscottage.ca/team-brae-er-new-product/ to help inspire you with her amazing creation of her favorite things! 

    If you get lost along the way, you can head to  Brae's blog at www.brae-er.com, as she has the complete blog list .http://wp.me/p4htXJ-wC


    Thanks for hopping along with us - we hope we were able to inspire you to get creative using some of the designs, products and techniques seen along the way.  Join us next time where we will be featuring things where it will be Back to 'school' we go! This hop will have a bit of a different twist on it- we will create a piece of artwork using current product BUT it must have a tutorial aspect.  Our bloggers may show this by a video, by picture tutorial or in another format!!  Can't wait to see what everyone comes up with next time!!

    1. Brae Montgomery-http://wp.me/p4htXJ-yY

    Saturday, August 2, 2014

    Cricut Compatible Stamp Sets

    As most of you know I LOVE my Cricut.  Adding a die cut shape to my cards or scrapbook layout just adds a little bit of ooomph to the project in my opinion.
    The greatest thing about the Close to My Heart Cricut cartridges is that they are bundled with three My Acrylix stamp sets and chipboard pieces and they come packed with 700 images – I’m not sure if there is another Cricut cartridge that offers that many shapes!
    The first and most exciting thing that I’d like to share is that Close to My Heart has added a shopping tab just for the Cricut Compatible Stamp Sets.  They do not follow the same retirement program as some of our other stamp sets and although they might not be in the catalog you can find them all right here!

    DSCN1061DSCN1062DSCN1063
    The next tip I’d like to share is how to store your stamp sets.  In the past I have stored my stamp sets in individual storage boxes separated by size and organized by number.  This system still works great for me, however I’ve enhanced it a bit by separating out my Cricut Compatible sets into a Large Organizer $27.50 Z1834
     Within the organizer I have separated out the cartridge type and they fit just perfectly!  

    DSCN1059DSCN1060
    My third tip I’m sure will make perfect sense…when you cut one – you may as well cut a half dozen!  When I first started with my Cricut I would make one cut at a time and then I realized that I didn’t always (even though our stamps are clear) get the image perfectly placed on the die cut paper so I started cutting more than one and you know what sometimes I started getting them stamped perfectly on the first try.  What to do with those other cuts – save them of course.  I keep them tucked right in with the stamp set for the next time I need to make a quick card.
    I hope you’ve found my tips helpful and that you’ll stop by again soon – or even better click on the follow button on the right and you’ll get a new e-mail each time I post.
    And if that wasn't enough info....there is a brand new Close To My Heart/Cricut cartridge coming in this catalog. It's not yet available (ProvoCraft has some production delays) so I'm waiting much as you are to get my hands on this amazing cartridge....CTMH has let us know it should be available in September 2014! 
    Let me tell you, it is the answer to this cardmaker's dreams!!!  


    The new-for-2014 cartridge is called "Artfully Sent."  With more than 700 images on this completely designed cartridge, the value is immense. Here's what theInspirations Book says about this cartridge:

    "Cardmaking has never been easier or more fun! With our newest Cricut collection you can make handmade masterpieces in no time at all. Choose from cards with sentiments cut directly into them, or combine several cutouts to create your own pop-up scenes. Featuring more than 25 different card themes and 5 different card formats including dynamic interactive designs, this cartridge has a card for any and all occasions -- even if the occasion is "just because"!  Card styles include pop-ups, scenes, sentiments, sleeves and pocket cards.  

    Now let's take a look at everything your $99 investment in this new cartridge will get you:
    1 Cricut Cartridge (700 images; cards and font)
    3 (that's right, THREE!) My Acrylix D-size stamp sets (value $17.95 each!)
    1 pack of 12x12" CTMH White Cardstock (a $9.50 value!)

    Let me give you a sneak peek at just one of the really fabulous cards you can make with this cartridge.  This is one that's shown in the Inspirations Book, as an example:


    Another great CTMH consultant found this screen shot of what the cartridge's book looks like to find this pop-up balloon image:


    See it there, in the "Pop Ups" icon, top (red)?  YES, Cricut cuts out the center of the card, and you just adhere it to your cover -- voila, you're a pop-up card artist!!  Add the cute banner ... or use it on other cards, scrapbook pages, etc. ... and you've got a darling card.

    And yes, you can even use it in Cricut Craft Room (for the Expression) or Cricut Design Room (with your Explore). Look here:


    How easy-peasy is that?!   I'm telling you, I've never been more excited about a Cricut/CTMH cartridge as I am about the pending arrival of "Artfully Sent."

    Here is Close To My Heart's video about this fantastic new cartridge


    Now, we're all prevented from "pre-selling" this Cricut cartridge because, frankly, there are many top-sellers who have been undercutting us little guys.  But I CAN take your name and e-mail address if you're interested in being the first on your block to order it from me as soon as it's available.